How to Apply Eye Shadow - A Step-by-Step Eyeshadow Makeup Guide
Unless you are a makeup pro, applying eyeshadow can seem like a daunting task. Let’s be honest! Do you even know what is a transition shade? Or does the inner corner highlight even do anything? Eyeshadow application goes beyond simply applying some colors on your eyelids. It’s an art and we’re here to help you become an artist! Read on to learn how to apply eyeshadow with this step-by-step eyeshadow tutorial for beginners.
How to apply eyeshadow
Step 1: Primer is a must - Helps create a smooth base for eyeshadow makeup
Step 2: Set the primer with a base color - Apply light matte or soft pink shade as the eyeshadow base
Step 3: Define your crease- Concentrate darker shadow in the eye crease - Sweep medium brown or taupe shade to create a seamless transition shade in your crease
Step 4: Highlight your inner corner and brow bone - Glam up your look by adding highlighter or golden eyeshadow to your inner eye corner and brow bone
Choose the right eyeshadow brush
When learning about how to apply eyeshadow, picking the right eye makeup brushes is crucial to get the desired results. Check out the must-have brushes to ace eyeshadow as a beginner.
• Blending brush
This fluffy, tapered brush seamlessly blends eyeshadow shades for a professional finish.
• Flat brush
Densely packed bristles help you pick up pigments and place on eyelids. Perfect for creating smokey eye makeup as well as simple eye looks.
• Angled brush
Ideal for creating sharp eyeliner looks, defined eyebrows, and highlighting the brow bone with precision.
• Pencil brush
With small, fine-tipped brush, you can smudge eyeliner, highlight inner corners, and apply eyeshadow with accuracy.
With the right eye makeup brushes in your vanity, you are now ready to follow these eyeshadow steps for beginners.
Pro tip: If you are just starting out with eyeshadow makeup looks, we’d suggest you to ditch the cut crease, the halo eyes, and the crazy gradient eyes. As impressive as these looks are, stick to the basic eyeshadow looks to learn and master different eyeshadow techniques and then have fun as you get better at it! Eyeshadow for beginners can be a breeze with our guide! Let’s start!
4-step eyeshadow tutorial for beginners
Here’s a stepwise eyeshadow tutorial for beginners to make your eye makeup quick and flawless:
Step 1: Primer is a must
How to wear eyeshadow, you ask? Just like you apply a primer before you go in with your face makeup products, you need to prime your eyelids for a smooth and even surface for your eyeshadows and increase its longevity.
• Use a dedicated eyeshadow primer or apply a tiny amount of your foundation or concealer and blend it all over your eyelids.
Step 2: Set the primer with a base color
This eyeshadow step for beginners focuses on the importance of using base eyeshadow color.
• Apply a light matte eyeshadow shade using a flat stiff brush all over your eyelid to set your primer, avoid stickiness, and prevent creasing.
• Alternatively, you can pick a soft pink shade from a nude eyeshadow palette for a natural-looking base.
Use your finger to pick up the eyeshadow and gently press it all over your eyelid as well if you aren’t used a flat brush.
Step 3: Define your crease - Concentrate darker shadow in the eye crease
This step of the eyeshadow guide for beginners will help you learn the tricks to define your crease. Add some more depth and dimension to your basic eyeshadow look by using a medium brown or taupe shade.
• Use a small, fluffy brush to create a seamless transition shade in your crease, blending lightly with a back-and-forth motion.
• For added dimension to your eye makeup look, use a slightly darker shade of brown and go over the outer half or three-fourths of your crease.
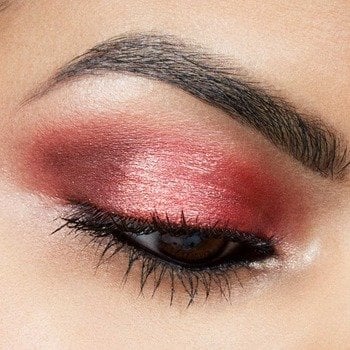
• For the pink eye makeup look, use a deeper pink tone in the crease instead.
• Blend the base shade and the crease shade using a clean blending brush for a seamless finish.
Step 4: Highlight your inner corner and brow bone
We will talk about how to pull off a perfect eyebrow look and highlight your inner corners in this eyeshadow steps for beginners.
• Add a light eyeshadow shade and run it just below the arch of your eyebrow for clean and sharp look.
• Apply a light gold or champagne shimmer eyeshadow or cream, liquid or powder highlighter makeup to the inner corner.
And it’s done! Now you know how to wear eyeshadow without worrying about creasing. Let’s move on to complete the eye makeup look.
Finish the rest of your eye makeup
Learning how to apply eyeshadow isn’t enough! You need to ace every aspect of eye makeup to get stunning results.
• Define your waterline with a kajal
• Outline your lash line with an eyeliner
• Get long and fluttery lashes with a generous coat of mascara
Tips and tricks to apply eyeshadow
When learning how to apply eyeshadow, you must be aware of these tricks to achieve stunning results:
• Try tape trick for precision
Place a tape diagonally at the outer corner of your eye for a precise, defined eyeshadow look. Remove it after blending.
• Look into the mirror
Look straight into in a mirror while applying eyeshadow to avoid dumping too much product in your crease.
• Add eyeshadow on lower lash line
Apply a complementary hue on your lower lash line to tie your look together.
• Correct fallout fast
Clean up excess eyeshadow that has dropped under your eyes with a small fluffy brush.
Now that you know how to apply eyeshadow for beginners, continue the rest of your face and lip makeup as usual and there you have it! An everyday eye makeup for beginners in just 4 easy-to-follow steps!
If you find it difficult to pick between the warm brown or soft pink eyeshadow looks, why not try both on with the Maybelline Virtual Try On tool. With this advanced tool, you can try various eye, face, and lip makeup shades on your eyes in real-time with zero commitment.
Finish your glam game strong with basic makeup products that work magic—think a dewy foundation, creamy concealer, flutter-ready mascara, and a pop of blush. These essentials are your backstage pass to blending eye, lip, and face makeup into one seamless masterpiece. With the right basics, every look becomes a canvas for creativity and confidence.