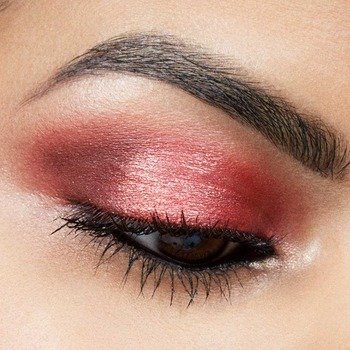
5-Step Matte Eyeshadow Look That You Can Rock Effortlessly!

The idea of going for a matte eyeshadow look may seem a bit bland. After all, all those glittery and shimmery eyeshadows are a foolproof way to add some charm to your look. While sparkly eye makeup may have a special place in your heart, you can make a huge impact with your matte eyeshadow looks too. Besides, shimmery eye shadows don’t go with every look, especially when you are hustling in your day-to-day life. On the other hand, matte eyeshadows go well with everything and are perfect for day-to-night looks - light and breezy for the daytime, but equally alluring and glamorous for evening makeup. Yes, sparkling eyeshadows might be easier to apply but with a little bit of prep and smart application, you can achieve the glitz and the glam even without the glitter. Not sure how to apply matte eyeshadow? Don’t worry, we’re here with a simple yet effective matte eyeshadow tutorial to help you rock it like a model.
How To Apply Matte Eyeshadow In 5 Easy Steps
• Step 1: Prime your eyelids thoroughly
Before you start with makeup application, don’t forget to cleanse, and moisturise your eyes and face. This will keep the skin feeling hydrated and prevent creasing. Then, before creating the matte eyeshadow look, apply primer all over your eyelid, up to your brow bone. The best practice is to use it everywhere the eyeshadow will be applied. This provides the perfect canvas for your eyeshadow to glide on, makes the pigments pop and helps the shades to last through the day. Let the Fit me primer fully absorb before you move on to the next step.
• Step 2: Blend the concealer well
Banish the blemishes and highlight your beautiful features by applying a dot of your concealer to each lid and taking it up to your eyebrow. Your eyelids often appear slightly discoloured or blotchy and using a liquid concealer helps to create a smooth, even-toned base for your matte eyeshadow look. If you are unsure of your ideal concealer shade match, you can use the Maybelline Foundation Finder tool and opt for a shade or two lighter to create the brightening effect. Make sure to blend it well.
• Step 3: Opt for a neutral eyeshadow base
When you work with matte eyeshadows, it’s best to pick a neutral shade at first. Whether you want to create an everyday matte eyeshadow look or one that’s dressier for the night, the base colour should always be on the neutral side. Placing the base colour all over your lids and up to the brow bone will give you a subtle wash of colour and help enhance the rest of the shades that you’ll be wearing. Additionally, using a neutral colour will also help cover up possible discolouration on the lids. The best way to apply the colour on your eyelids is by sweeping the shade using a flat eyeshadow brush, gently. And yes, you don’t want a heavy coating of colour, so use a soft hand.
• Step 4: Focus on the lids
Once you’re done applying the base colour, it’s time to focus on your eyelids. All you need to do is blend a deeper coloured eyeshadow on the lids and start creating depth and dimension. You can use the same brush that you used earlier, by flipping it to the other side and lightly tapping the eyeshadow onto the lid until you achieve the desired effect. Remember, with matte textures, you need to work a little quicker while blending and applying so that they look consistent and even throughout.
• Step 5: Contour the crease
Take the deepest shade of the eyeshadow and blend it onto your crease to create more depth and bring out the shape of your eyes. The most effective way to do so is to blend it in a semi-circular motion with a tapered brush, back and forth. A pro tip is to keep blending for a longer time, even when you think you are done. Blending well will ensure that all your eyeshadows work together, and the result is more polished. So, blend, blend, blend, and when in doubt, blend more and you will be good to go. To add a perfect finish to your matte eyeshadow look, apply eyeliner or kajal or both and finish off with mascara. You can also enhance the shape of your eyebrows by using the Fashion Brow Eyebrow Pencil and complete your look with ease.
Now that you’ve learned how to achieve the matte eyeshadow look, you might be wondering which eyeshadow shade will suit you the best. However, the good news is that you don’t need to bother as we’re here to the rescue. To solve this dilemma, all you need to do is head to the Maybelline Virtual Try-On tool and find your best suited shade in seconds. This tool helps you experiment with different eye makeup, face makeup, and lip makeup products, virtually, from the comfort of your home, without any commitments. Once confident, try your hands on the above-mentioned matte eyeshadow tutorial and look the best from the rest effortlessly!
