Eyebrow Mapping Tutorial: Step-by-Step Guide to perfect Brows

Eyebrows are everything. Your symmetry, bone structure, and even the shape of your face can be determined by how you frame your eyebrows. This is where eyebrow mapping comes in. This technique helps you create even, beautiful brows that suit your face shape.
Whether you're new to the concept or have heard of brow mapping through beauty tutorials, this comprehensive guide will explain what is eyebrow mapping, its benefits, and how you can try it at home or with a professional.
Eyebrow Mapping Tutorial: A Step-by-Step Guide
Step 1: Identify the Starting Point - Learn where both your brows should begin
Step 2: Find the Arch - Mark where your brows get a perfect, symmetrical arch
Step 3: Determine the Tail - Learn where to feather out the tail of your brows
Step 4: Connect the Dots - Join the start, arch, and tail on both ends for a perfect shape
Step 5: Clean Up and Define - Tweeze out or gel down extra hair.
What Is Eyebrow Mapping?
Eyebrow mapping is a shaping technique that uses your unique facial features, like your eyes, nose, and natural brow bone, to help you map out the perfect eyebrow shape meant for you. Instead of picking up trending brow shapes from the internet, eyebrow mapping helps you get brows symmetrical and proportional to your face.
If you’re not big on tweezing and get your brows done at your neighbourhood salon, mapping your brows out lets you get them right every single time. Be it waxing, threading, tinting, or microblading, here’s how brow mapping helps you get it right every single time.
Eyebrow Mapping Tutorial: A Step-by-Step Guide
Want to get the perfect brows at home? This eyebrow mapping tutorial is simple, beginner-friendly, and needs just a few tools that may already be around in your vanity!
Here’s What You'll Need:
• Eyebrow pencil/Ruler/string
• Small mirror
• Tweezers or brow razor (if you want to pluck your eyebrows at home)
Step 1: Identify the Starting Point
Your brow mapping begins with finding the starting point of your brows. Place the brow pencil/ruler/or your string vertically alongside the outer edge of your nostril. The point where the pencil hits your brow is ideally where your eyebrow should start. Mark this with a dot on both sides.
Step 2: Find the Arch
Now that you know where your brow begins, it’s time to find your arch. An arch is crucial to give your brows their shape and your face its structure. Keeping the pencil at the same spot, next to your nose, angle it towards your iris. The point where it hits your brow is where the arch should peak. Mark it again on both sides.
Step 3: Determine the Tail
Now angle the pencil from the outer edge of your nostril to the outer corner of your eye. The intersection with your brow is where the tail should end. Mark that spot too.
Step 4: Connect the Dots
Using the same eyebrow pencil, a light eyeliner, or a waterproof kajal, start drawing light lines that connect the start, arch, and tail of your eyebrows. This outline will help you visualise your ideal shape. Use gentle strokes and make sure both your brow mappings look even.
Step 5: Clean Up and Define
Brush your eyebrows in their natural direction and look for any sparse spaces in your eyebrow mapping. If they thin out in a spot or two, you can use the eyebrow pencil to fill in the gaps and get a fuller, defined look. If you know your way around tweezers, you can also pluck out any stray hair outside the mapped area. If you’re unsure, use an eyebrow gel to smooth it over and define your edges.
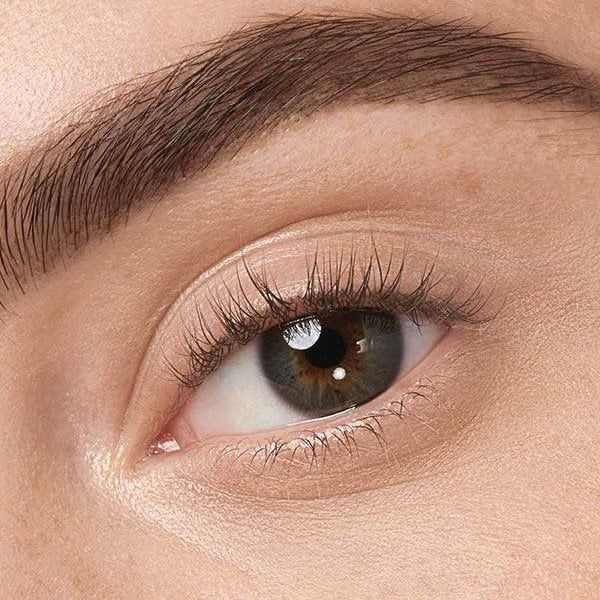
Pro tip: You can use a color corrector and concealer around your eyebrows to take away any pigmentation. A tinge of highlighter in the inner corner of your eyes will also help them appear brighter. Use eyeliner, mascara, and kajal to define your eye makeup. You can also try a cut crease eyeshadow look if you are going for a full face.
Common Mistakes to Avoid while Eyebrow Mapping
Even with the best intentions, some brow mapping attempts go off track. Here’s what to avoid:
Don’t start drawing without proper measurement. If an eyebrow pencil feels too stiff, you can also use a thread.
Don’t make very pointed arches that may not suit your face shape. Read up more about the best eyebrow shapes for different face types.
If you are tweezing, don’t overpluck, especially at the start of your brows.
Don’t use an unsharpened pencil. It may make your eyebrow mapping lines less precise.
Achieving the perfect brows is never guesswork; all it takes is a little eyebrow mapping. Whether you're a beginner or a beauty pro, an eyebrow mapping tutorial allows you to shape, groom, and style your brows with precision and confidence. Learn more eye makeup tips with Maybelline and learn how to get microbladed eyebrows using makeup at home.
Don’t forget to check out more face makeup and lip makeup products and try them out online with the Virtual Try-On tool and the Foundation Finder Tool.