Why An Eyelash Curler Is Your Mascara's Best Friend & How To Use It?
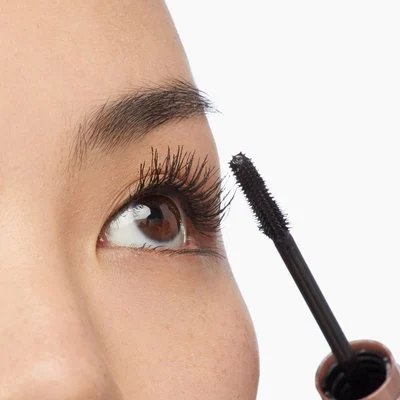
An eyelash curler helps lift, shape, and define your natural lashes before mascara, making them appear longer, fuller, and more open. If you've ever wondered why use an eyelash curler, the answer is simple: it helps mascara perform better. And learning the right curling technique instantly improves your eye makeup routine with minimal effort. Consider this your go-to guide for learning how to use an eyelash curler, when to curl your lashes, and the best techniques to maximize your mascara results.
In This Article:
- Why Should You Use An Eyelash Curler Before Mascara?
- How To Use An Eyelash Curler Like A Makeup Pro?
- Should You Use An Eyelash Curler Before Or After Mascara?
- What Are The Best Tips For Using An Eyelash Curler?
- Key Takeaways About Using An Eyelash Curler Before Mascara
- Frequently Asked Questions About Using An Eyelash Curler Before Mascara
Why Should You Use An Eyelash Curler Before Mascara?
Mascara adds color, length, and volume, but it can't always create a noticeable lift on its own. If your lashes are naturally straight, point downward, or lose their curl throughout the day, an eyelash curler gives them the shape mascara needs to deliver its best results.
Curling your lashes first creates a lifted base that helps mascara coat every lash more evenly while making your eyes appear brighter and more awake. The difference is subtle yet noticeable, even with a single coat of mascara.
Benefits Of Using An Eyelash Curler Before Mascara
Think of an eyelash curler as the prep step for your lashes just like primer prepares your skin for foundation. It doesn't replace mascara; it helps mascara perform even better.
- Instantly lifts lashes from the roots
- Creates the illusion of longer-looking lashes
- Makes mascara appear more volumizing
- Opens up the eyes for a brighter look
- Helps separate lashes before mascara application
- Creates a more polished eye makeup finish
How To Use An Eyelash Curler Like A Makeup Pro?
Learning how to use an eyelash curler properly takes less than a minute, but using the right technique makes all the difference. The goal isn't to create a sharp bend, but to achieve a soft, natural-looking curl that enhances your lashes without causing stress or breakage.
Step 1: Start With Clean, Dry Lashes
Starting with clean, dry lashes ensures a safer application and a smoother, more natural-looking curl.
Step 2: Position The Curler Correctly
Open the curler and place your upper lashes between the pads. Position it as close to the lash line as possible without pinching your eyelid.
Step 3: Gently Press And Hold
Apply light, even pressure for about 5 - 10 seconds. Avoid squeezing too hard, as gentle pressure is enough to shape the lashes.
Step 4: Create A Soft Curve
For a more natural curl, move the curler slightly toward the middle of the lashes and press again for a few seconds. Repeat once near the tips if desired. This creates a gradual lift instead of an unnatural angle.
Step 5: Finish With Mascara
Apply your favorite mascara immediately after curling. Wiggle the wand from root to tip to coat every lash while maintaining the lifted shape. Choose the best mascara for your lash type; for short lashes, choose lengthening mascara, for thin or sparse lashes, use volumizing mascara, for straight lashes or small eyes, go for curling mascara.
Pro Tip: If one eye seems less lifted than the other, add another gentle press at the roots instead of applying extra mascara.
Should You Eyelash Curler Before Or After Mascara?
The answer is simple: Always curl your lashes before applying mascara.
One of the most common makeup mistakes is curling lashes after mascara has dried. Mascara makes lashes firmer, so using a curler afterward increases the chances of lashes sticking to the curler, bending awkwardly, or breaking.
Here’s the correct order:
- Start with clean lashes
- Use eyelash curler
- Apply mascara
- Go for second mascara coat (optional)
The only exception is using certain heated lash tools specifically designed for touch-ups. Traditional eyelash curlers should always be used before mascara. Following this simple order helps maintain healthier lashes while giving your mascara the best possible foundation.
What Are the Best Tips For Using An Eyelash Curler?
These tips for using an eyelash curler can help you achieve a lifted, natural-looking curl every time.
- Never curl lashes coated with mascara. Mascara hardens as it dries, making lashes more prone to sticking to the curler or snapping during curling.
- Replace the silicone pad every few months if it becomes worn.
- Use light pressure instead of squeezing forcefully.
- Curl in two or three sections for a softer, rounded shape.
- Keep your eyelash curler clean to prevent product buildup.
- Avoid rushing. Slow, gentle presses create better results.
- Don't tug or pull the curler away while it's closed.
- Apply mascara immediately after curling to help maintain the lifted effect.
Now that you know why you should use an eyelash curler and how to use an eyelash curler correctly, it's time to put these tips to practice. An eyelash curler and mascara are the ultimate lash duo, helping create lifted, defined, and eye-opening lashes with minimal effort. So, what are you waiting for? Curl, coat, and create stunning, clump-free lash makeup like a pro.
Ready to elevate your lash game? Pair the right eyelash curler with your favorite mascara designed for your lash needs, whether you're after length, volume, or lift and create effortlessly defined, clump-free lashes every time. If you still have confusion, use a Virtual Try-On tool to check out all eye makeup, face makeup, and lip makeup products virtually. Try the Foundation Shade Finder Tool to get the tone-matched base makeup online.
Key Takeaways About Using An Eyelash Curler Before Mascara
- An eyelash curler lifts and shapes lashes, helping mascara deliver better length, volume, and definition.
- Always curl clean, dry lashes before applying mascara to prevent sticking or breakage.
- Learning how to use an eyelash curler correctly creates a softer, longer-lasting curl.
- Use gentle, gradual presses from the roots to the tips for a soft, natural-looking curl.
- Keep your curler clean and replace the silicone pad regularly for safe, effective use.
- Pair an eyelash curler with the right mascara to create lifted, defined, eye-opening lashes with minimal effort.
Frequently Asked Questions About Using An Eyelash Curler Before Mascara
Can an eyelash curler damage or pull out my lashes?
Not when used correctly. Curl clean, dry lashes with gentle pressure and avoid tugging the curler. Replacing worn silicone pads regularly also helps prevent snagging or unnecessary lash breakage.
Why doesn't my lash curl last all day?
Straight or heavy lashes may naturally lose their curl over time. Curling properly before applying a lightweight or waterproof mascara can help maintain lift for longer without weighing lashes down.
Is it okay to use an eyelash curler every day?
Yes. Daily use is generally safe when you curl gently before mascara and keep your curler clean. Avoid excessive pressure or repeatedly curling the same section to minimize stress on your lashes.
Why do my lashes look crimped instead of naturally curled?
This usually happens when the curler is squeezed too hard in one spot. Instead, use gentle presses from the roots toward the middle of the lashes to create a smooth, natural-looking curve.
What should I do if my eyelash curler pinches my eyelid?
Reposition the curler closer to your lash line without forcing it against the skin. Looking slightly downward into a mirror can make placement easier and help prevent accidental pinching.