5-Step Guide on How To Recreate Brow Lamination at Home

The idea of eyebrow lamination might sound exciting and enticing, but not all of us have the time or money to get it done frequently. Fortunately, there’s nothing that makeup can’t fix! In this case too, you can easily achieve salon-like brow lamination effect with this 5-step guide and a few makeup products. So, read on and get ready to flaunt your laminated eyebrows!
How To Fake Brow Lamination at Home in 5 Easy Steps
Prep & Pat Dry: Remove makeup and residue from your brows. Pat dry.
Brush Your Brow Hair: Brush brows upwards and outwards with a clean spoolie.
Apply Brow Gel: Apply a small amount of tinted brow gel, brushing upwards.
Set & Sculpt: Let the gel dry, then press and shape brows with the spoolie end.
Fill in the Gaps (Optional): Fill in any gaps for a polished look.
What is Eyebrow Lamination and Why is it Popular?
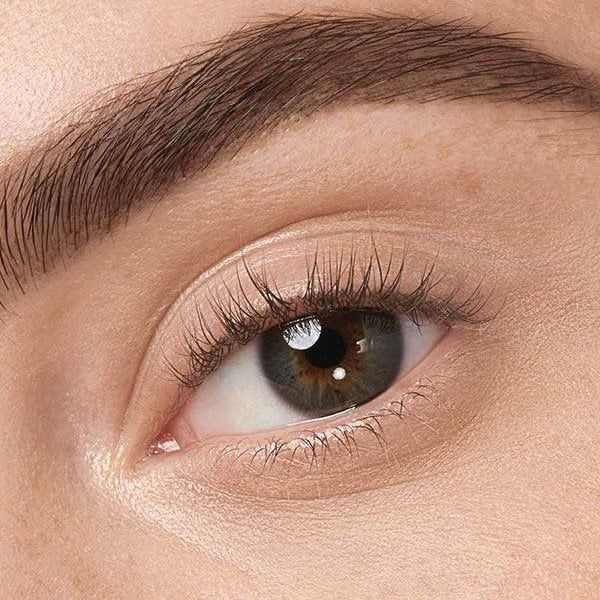
What is eyebrow lamination? Does it involve needles? Is the procedure painful? These questions may have puzzled you when you first heard the term brow lamination. So, what exactly happens while laminating brows? It’s a semi-permanent process that lifts and straightens, i.e., reshapes and resets brow hairs using chemical solutions, neutralizers, etc., giving them fuller, lifted, and more defined texture.
Why is eyebrow lamination popular:
• Painless & Needle-Free: Eyebrow lamination is non-invasive and painless
• Tames Unruly Hair: Paves the way for bold, defined brows
• Customizable Shape: Fill sparse areas and create your perfect arch
• Long-Lasting & Low Maintenance: Lasts for several weeks with minimal upkeep
The salon-based brow lamination benefits are indeed alluring. However, you may experience allergic reactions, such as redness, itching, swelling, bumps, etc. Well, here’s an easier alternative to faking eyebrow lamination at home and achieve similar results.
5-Step Guide to Eyebrow Lamination at Home
Here's a step-by-step tutorial on how to fake brow lamination at home using makeup products.
• Products Needed: Tinted brow gel, eyebrow pencil, concealer, spoolie.
Step 1: Prep & Pat Dry
Start your at-home eyebrow lamination journey with a clean canvas, aka clean brows. Wipe your brow hair with a gentle makeup remover to clean off oils and debris. Pat dry.
Step 2: Brush Your Brow Hair
With a clean spoolie brush, brush your eyebrow hairs up and outwards in the direction of natural growth. This step is crucial to identify your natural eyebrow shape, check for any gaps or places that require additional attention.
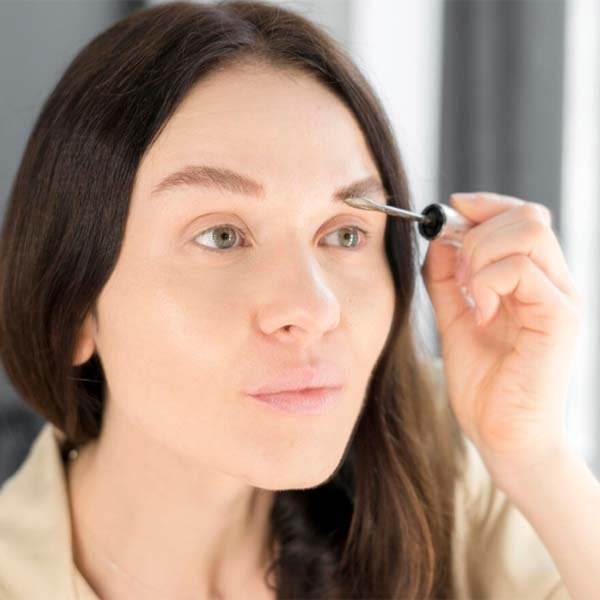
Step 3: Apply Brow Gel!
This is where the magic begins! Go for a semi-permanent tinted brow gel and apply a teensy amount to your brows with the spoolie. Focus on applying the brow gel in your desired direction, ensuring each brow hair is coated.
Step 4: Set and Sculpt
Once you have flawlessly shaped your brow, let the gel dry and set for a few seconds. Now, shape your brows with the end of the comb. Gently press to get the laminated brow look.
Step 5: Fill in the Gaps (Optional)
For added definition or to fill in sparse areas, use an eyebrow pencil (choose a shade that complements your natural brow hair color). Lightly pack in sparse areas, following the shape you established using the brow gel.
• Pro tip: Post-brow lamination, clean up and define your brow area with concealer.
Now that you know how to fake eyebrow lamination at home, let’s learn some tips to get a flawless brow look.
Additional Tips for Creating Brow Lamination at Home
Say yes to a bold brow look with these expert-approved tips on brow lamination:
Less is More
When it comes to brow makeup, less is more! Start with a small amount of brow gel and gradually add more if needed. Applying too much product can make your brows look stiff and unnatural.
Avoid Harsh Line
Brows frame your face and tie your entire look together. Hence, you must avoid drawing thick or harsh lines. Fill in the gaps using light hand and gentle strokes.
Experiment with Different Gels
You can experiment with clear gel or tinted brow gel to find one that works best for your brow type.
Keep Q-tip Handy
Clean up any excess product with a wet Q-tip.
Beginners, be patient with the at-home eyebrow lamination process! Getting a perfect laminated look may take a few attempts. So, don't shy away from experimenting with new brow trends and have fun with it!
Follow these steps and tips, and thank us later! Not sure how to choose a brow gel for this laminated look? Navigate through the Maybelline Virtual Try-On tool to virtually try different eye makeup, face makeup, and lip makeup from the comfort of your home. For more makeup-related inspos, explore the Maybelline brow and eye makeup tips and be a pro.
While experimenting with at-home brow lamination, it's also essential to understand how to shape eyebrows correctly for your face type. Start with eyebrow mapping—a step-by-step method that helps identify where your brows should begin, arch, and end. This technique is a game-changer, especially if you're trying to fix asymmetrical brows and achieve a balanced, polished look. Keep in mind that the best brow shapes differ for every face; for instance, softer arches flatter round faces, while angled brows can enhance heart-shaped ones. Once you determine the right shape, lamination will only enhance the overall effect. Don’t be afraid to explore different styles and textures until you discover what suits you best. Remember, practice makes perfect—and your dream brows are just a few tries away!