How to Do Airbrush Makeup at Home?
No filter makeup in real-time! Step into the world of airbrush makeup – a new-age makeup technique that delivers a smooth, camera-ready finish without hard blending with multiple brushes. From parties to the wedding events, beauty fanatics now swear by airbrush makeup for a diva-like, glam yet natural glow. The good news is - with the right airbrush tool, tailored makeup formulas, and practice, you can now also master this technique. But before diving into the steps, let’s understand what is airbrush makeup, its benefits, and more! Flawless makeup is on the way!
How to Do Airbrush Makeup?
•Prep Skin: Cleanse, moisturize, and prime.
•Foundation: Spray light, circular layers 4–6 inches away.
•Concealer: Lightly mist over blemishes and under-eyes.
•Blush: Spray from apples of cheeks to temples.
•Highlight: Mist on cheekbones and brow bone.
•Complete Makeup: Do eye and lip makeup. No setting spray needed.
What is Airbrush Makeup?
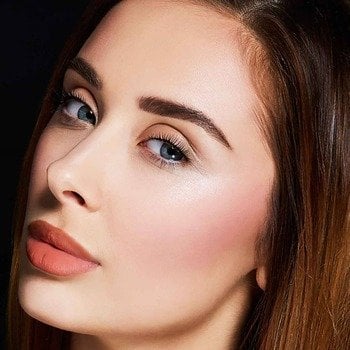
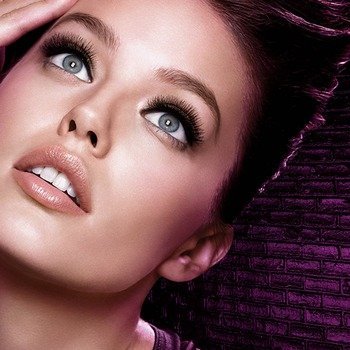
Simply put, airbrush makeup is the method of spraying foundation, blush, and other makeup products onto the skin using an airbrush gun. The technique doesn’t employ traditional brushes or sponges, rather, it utilises a tailored tool to apply makeup in a fine mist, creating an even, seamless layer and long-lasting results without any cakiness. If you’re wondering what is airbrush makeup, think of it as a soft-focus filter and second skin finish that covers imperfections without masking your natural beauty. Airbrush makeup is ideal for weddings, photoshoots, and film shooting.
Airbrush Makeup Benefits
Check out the several airbrush makeup benefits that make this makeup technique highly desirable:
Smooth Finish
Airbrush makeup delivers a smooth finish and streak-free appearance.
Lightweight Coverage
The technique is popular due to the lightweight, natural, buildable coverage it provides.
Long-lasting Results
Airbrush makeup lasts for extended hours, making it ideal for weddings, photoshoots, and film shoots.
Adaptable Look
You can choose the airbrush makeup technique for both natural everyday makeup and dramatic night-time glamour.
Tools Required for Airbrush Makeup
Here’s a list of tools or products needed to accomplish this method:
Airbrush Makeup System
It has three components that do the actual magic!
• Airbrush Gun: Hand-held gun that shoots out the makeup in a thin mist. Pick a dual-action airbrush for greater control over airflow and product output.
• Air Compressor: Maintains air pressure for smooth application. Look for one with adjustable pressure settings.
• Air Hose: Connects the gun to the compressor.
Airbrush-friendly Makeup Products
Specially formulated liquid foundations, blushes, and highlighters that will go through the airbrush gun without clogging the nozzle.
Cleaning Solution & Brushes
To keep your airbrush gun clean, ensuring it operates smoothly.
How to Do Airbrush Makeup? Step-by-Step Guide
Step 1: Prep Your Skin
Cleanse your face. Follow with a lightweight moisturizer to hydrate your skin. Now, apply a primer to smooth the surface, control oil, and get a long-wearing effect. This allows the airbrushed layers to set evenly and remain longer.
Step 2: Apply Foundation
Take a suitable lightweight foundation and pour it into the reservoir cup. Hold the gun 4 – 6 inches away from the face. Start spraying the foundation using light, circular strokes. Stop and look. Layer on slowly rather than applying all at once. You must control the flow to avoid over-layering or clustered layering at one place.
Read our guide on Complete Foundation Guide for Beginners to select the right shade at one go.
Step 3: Conceal Blemishes
Clean the reservoir cap and unload the lightweight liquid concealer. Keep the product flow at a minimum setting and spritz thin sprays to cover under-eyes and blemishes for more area coverage.
Step 4: Blush
Hold the airbrush gun 1 - 2 inches away from your face. Smile and start spraying blush from the apples of your cheeks towards the temple. For added drama, wait for 10 – 15 seconds and add another sheer layer of blush.
Step 5: Highlight Your High Points
Now, hold the airbrush gun 3 – 4 inches away from the face, spray, focusing on brow bone and cheekbone. A light mist of highlighter can make cheekbones stand out and give a soft shine.
Step 6: Complete Makeup
Finish your eye makeup and lip makeup as usual.
Pro Tip: Avoid using setting spray as the airbrush makeup itself sets the makeup flawlessly.
Additional Tips for Airbrush Makeup
• Apply thin layers and layer coverage slowly.
• Always maintain the airbrush gun at a distance from the face.
• Clean out your airbrush tools after each use to prevent clogs.
• Safety first! Protect your eyes from overspray.
Now that you have an idea of what airbrush makeup is, let’s understand how it is different from HD makeup.
Airbrush Makeup Vs. HD Makeup
The difference between airbrush and HD makeup lies in the techniques or tools used. HD makeup includes applying makeup using traditional brushes, sponges, or even fingertips to diffuse light and minimize the appearance of fine lines on high-definition cameras. On the other hand, airbrush makeup uses a specially designed makeup gun to spray ultra-thin layers of foundation for a seamless and long-lasting effect.
Our guide on airbrush makeup is now yours! With proper tools and a little practice, you too can have the ethereal glow of airbrush makeup.
While you are here, don’t forget to try Virtual Try-On tool to test out the different face makeup, eye makeup, and lip makeup products from the comfort of your home. Give yourself a virtual makeover and experiment with different formulas and colours with no commitment. Unsure about your foundation shade? Head towards the Foundation Shade Finder tool to find your ideal shade in just a few clicks.